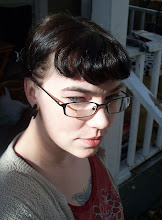
I've been on a bit of a hiatus, owing to several factors: 1. My dancing has taken over my life. The performance troupe I'm a member of recently had its first paying gig, and we were freaking over it for about a month straight. 2. My computer died. So I got a loaner, but it didn't have the "Q" or "1" or "tab" buttons. Lemme tell you-- you might THINK you don't need them, but you do. Especially when you're doing your taxes. 3. I had to do my taxes. 4. My definition of "what I do" has been changing.
Back in ye olde high school/college days, I'd make crap all day long just for the sheer joy of it. That, and I was poor, but wanted to dress super scary like the Hot Topic denizens did, and since I couldn't shell out $15 for a tee-shirt, I had to make one. Though it was more PIMA than being able to go out and buy whatever supplies I needed, the days of thrift store crafting were really good for my creativity. I am one of those people who thrive when they're forced to "make do."
Well, it's hard to "make do" when you're "making money" at "making stuff." When a customer requests a purple corduroy hat with pink faux fur, you can't wait around until you see a pair of purple cords to hack up. You go out and buy the material. This mode of thinking really started to poison my creative urges, which were formed at a time when I wouldn't have the bloody purple hat unless I made the thrift score. Moreover, many of my past projects were inspired and not FORCED by thrift sale items. Left without the constant influx of new shiny cheap things, I started having big problems with inspiration.
So I went back to the source, or at least a source of inspiration that hasn't let me down-- the Crafty Chica. Kathy Murillo's craft projects are fantastic for a bunch of reasons, but one thing I love about her is she's not tied down when it comes to supplies. If she wants you to use paint, she doesn't require you to have a certain brand (although she's knowledgable on what's worth buying, and will say so when needed). She just says, "Get some craft paint. Then do this." I own several of her books (I have a blurb in one!), and last night really looked through them and felt-- lo! Inspired. So thank you, Chica, for reminding me that the coolest thing about me is, well, myself, and that my inspiration was only hiding from my efforts at making myself into a label.
I also have to thank Kathy for making me want to write. As I sit down in my basement writing this (new wireless router! New laptop! OMG!), I can see a new future stretching out ahead of me, and it's much rosier. So I pledge, here on this blog, to go back to my make-it-and-explain it roots. That means more photos of projects, more tutorials, more MEness than I've been using for the past year. It's gonna be a bright, bright, sunshiney thread-filled day.
Sunday, February 14, 2010

Monday, January 18, 2010
More Steampunk bathroom details
I do love steampunk. Have I mentioned? Ideally, I'd do my bathroom like a Victorian woman's powder room within an airship-- old bottles and other antiques, sepia photos and vintage lace, but also special buttons and gizmos that would, upon command, fill the room with the scent of chocolate or drench my bathwater with camphor epsom salts.
Not likely to happen. So I've been piecing together bits of stuff I've found over the past two years. The paint color is what the bathroom came with-- sort of a dusty salmon/adobe color, with a "suede" finish.
Not likely to happen. So I've been piecing together bits of stuff I've found over the past two years. The paint color is what the bathroom came with-- sort of a dusty salmon/adobe color, with a "suede" finish.

This picture inspired it all. I bought the poster while in college and framed it in the most ornate thing I could find (at the Family Dollar). People have said it's "inspirational." Heh. Needs to be fixed-- you can see in the lower right corner the poster is pulled away from the frame. Oh well.


Random bobs on a shelf. Thingies include a steampunky squirtgun recon, two Kuchi bracelets I rarely wear, an hour glass, a pair of glass "specimen jars" (one with a fairy inside, the other with "teeth" from the tooth fairy), a box that says "Share" and holds a zombie finger puppet, a hair clip made from feathers, a wax stamp, a framed picture of Mike at age 5, a bejeweled pear, and a small clay turtle that was living in a plant that died. Below the shelf are two hanging brass bucket things, and a picture of Hercules and Leo.

The "What Women Love" postcard that a friend brought back from Germany, copper Q-tip holder, and my own "Gytha's Special Bath Soak," which is Burt's Bees bath salts in a bottle with a handmade label. I should get a close-up of that.
Seriously, I need ideas. I'm planning on stenciling the top of the room, but it can't be anything too bizarre, because oil paint is a bitch to go over later if you have to sell the place. Maybe a female cameo with wings on either side?
Faucet Knob Necklace Holders

These are postitioned right under the hair flower holder. They're just faucet knobs-- the type that are often found outside, on a hose-- with the center bits removed and replaced with long screws. They were originally meant to hold hand towels, but since they don't stand out from the wall much, they were pressed into service as necklace holders. Works out great! (And I saw this somewhere else, but can't remember where. Oops.)
This idea works with lots of stuff-- drawer knobs can be screwed right to a wall, or to a plaque, a shelf... With drawer pulls, you often have a choice of ones that screw through the front or the back. With ones that have the hole in the back, you could mount them on something thin, like a wooden yardstick, which could then be hung.
The house updates continue. I still want to make a jewelry holder like this one I saw on Cut Out + Keep, but I don't have the room for it yet. I'm also messing around with my bedroom, and since my belly hurts too much today to actually get up and play with craft stuff, I may just continue photographing and posting the "before" pictures.
Hair Flower Holder
I finally made something that wasn't for dancing in, or selling, or for someone else. It IS mostly for holding dance stuff, but meh. It makes my bathroom look nicer!

It's for holding all my hair flowers. My bathroom has a loose Steampunky theme, so I used a wooden frame (thrift shop, $.25) and some bits of trim from a grab bag at Hancock Fabrics ($.99). I just removed the picture from the frame, clipped off the metal staples that were bent to hold it in there, and hot glued the trims across the back. I also used a bit of a copper/bronze stampbooking rub-on paste to shine up the wood, but it vanishes when photoed with a flash. I know the trims are not evenly spaced-- I did that on purpose, because some of my flowers are much larger than others.

My choices in hair flowers makes this look less Steampunk, obviously, but it works well and looks pretty whether or not it's full of petals. Would work nice for earrings, as well, if your ears aren't stretched like mine.

It's for holding all my hair flowers. My bathroom has a loose Steampunky theme, so I used a wooden frame (thrift shop, $.25) and some bits of trim from a grab bag at Hancock Fabrics ($.99). I just removed the picture from the frame, clipped off the metal staples that were bent to hold it in there, and hot glued the trims across the back. I also used a bit of a copper/bronze stampbooking rub-on paste to shine up the wood, but it vanishes when photoed with a flash. I know the trims are not evenly spaced-- I did that on purpose, because some of my flowers are much larger than others.

My choices in hair flowers makes this look less Steampunk, obviously, but it works well and looks pretty whether or not it's full of petals. Would work nice for earrings, as well, if your ears aren't stretched like mine.
Friday, January 1, 2010
Huzzah for handmade holidays (and birthdays)
Anna, don't read this. I talk about the present I'm giving you tomorrow. Okay? Are you stopping? Okay, good.
^_^
Due to money troubles (who DIDN'T have 'em this year?), we really buckled down and did a lot of present MAKING this December. My husband, newly apron'ed, made loaves of fruity bread for our family. The kids colored pictures. I made tons of stuff, because that is the way of my people.
The grand made-it list:
I'm terribly pleased with myself today, because I made a gift in under an hour. I made a scoodie-- a hooded scarf. The original pattern (or instruction, I guess, as I made my own pattern) came from Vegbee at IndieTutes. It is awesome. SHE is awesome. It looks a bit complicated for a beginner, but trust me, once you've made one, the process is much easier. Unless you're me, and you mess up the way to do the scarf. Regardless, it worked, and now I have a polar fleece red/black reversible scoodie for my sister's birthday (which is the 2nd of January. Poor girl.) I'm calling it the Red Riding/Ninja Hood. If I had time, I'd make a little ninja/red riding hood keychain dolly to go with it.
*proud*
*tired*
Realizing I am more tired than proud at this point. Scoodie still needs to be wrapped and I should throw some clothes in a backpack (field trip to Madison in the morning).
^_^
Due to money troubles (who DIDN'T have 'em this year?), we really buckled down and did a lot of present MAKING this December. My husband, newly apron'ed, made loaves of fruity bread for our family. The kids colored pictures. I made tons of stuff, because that is the way of my people.
The grand made-it list:
- My husband's apron. My procrastination list said I was making one for him and a matching one for our daughter, but I never got around to making the little one. She'll have to spill her pretend cookie dough all over a pretend apron instead.
- A zipper-mouth mask for my son. Yes, I figured it out. I'd bought a ninja suit at Joann when it was 90% off after Halloween. I wrapped the whole shebang up with a note that said, "I will sew a zipper on the mask." And I did. He wears it to the store and gramma's and everywhere else.
- Felt food for my daughter. All told, she got: 2 pieces of bacon, 2 pancakes with syrup and butter, a fried egg, two pieces of bread/toast, peanut butter, jelly, a slice of cheese, a tomato slice, a pickle, and a piece of lettuce. I list it all out because she puts it all between the two slices of "bread" and makes everybody eat a "shamitch." She also rolls it up and says it's a taco.
- Mix CDs for my family.
- Ties for my brother, who moved from WI to FL, the sissy sissypants. Okay, okay, there was a good job involved, but still. We all know who ran from the snow. The ties were stenciled, one with a subtle gold WI outline (on a tan tie) and the other with a more bold freehand "WISCO" in red (on blue). May I add that I'm REALLY not that into being from Wisconsin, but my brother is. That's cool. Distance makes the heart grow fonder.
- Arm warmers for my sister. She was there when I made them.
- Flower/feather hair pieces for the two ladies I dance with in performance troupe.
I'm terribly pleased with myself today, because I made a gift in under an hour. I made a scoodie-- a hooded scarf. The original pattern (or instruction, I guess, as I made my own pattern) came from Vegbee at IndieTutes. It is awesome. SHE is awesome. It looks a bit complicated for a beginner, but trust me, once you've made one, the process is much easier. Unless you're me, and you mess up the way to do the scarf. Regardless, it worked, and now I have a polar fleece red/black reversible scoodie for my sister's birthday (which is the 2nd of January. Poor girl.) I'm calling it the Red Riding/Ninja Hood. If I had time, I'd make a little ninja/red riding hood keychain dolly to go with it.
*proud*
*tired*
Realizing I am more tired than proud at this point. Scoodie still needs to be wrapped and I should throw some clothes in a backpack (field trip to Madison in the morning).
Sunday, December 20, 2009
For we procrastinators
I'm still not done with my shopping and crafting of presents.
This isn't good. This is very bad. Sure, it looks at first like I've got 5 days left, but Solstice is tomorrow. So I am doing the equivilent of shopping on Christmas Eve.
My son wants a "zipper mouth mask." He's almost 9. I have no idea where he saw this idea, but he's been on about it for a month straight, and well... I just haven't gotten around to it. I keep trying to figure it out-- maybe two ovals made from stretchy material with a band inbetween? Maybe hack apart a ski mask? Where the hell are my zippers?
I'm lucky in that the Solstice gifts are few-- just my husband, son, daughter and stepson. I have other things to make, but have another few days to put them off before getting frenzied again.
Here's a very last-minute list of how-tos for gift giving, provided by Sew Mama Sew! It's even organized by type. So handy, it's even in the sidebar over there ----->
This isn't good. This is very bad. Sure, it looks at first like I've got 5 days left, but Solstice is tomorrow. So I am doing the equivilent of shopping on Christmas Eve.
My son wants a "zipper mouth mask." He's almost 9. I have no idea where he saw this idea, but he's been on about it for a month straight, and well... I just haven't gotten around to it. I keep trying to figure it out-- maybe two ovals made from stretchy material with a band inbetween? Maybe hack apart a ski mask? Where the hell are my zippers?
I'm lucky in that the Solstice gifts are few-- just my husband, son, daughter and stepson. I have other things to make, but have another few days to put them off before getting frenzied again.
Here's a very last-minute list of how-tos for gift giving, provided by Sew Mama Sew! It's even organized by type. So handy, it's even in the sidebar over there ----->
Friday, December 18, 2009
Let there be light
We're coming up on the Winter Solstice, which is my cold months celebration of choice. It makes extra sense to me, a pale girl of Scandinavian descent, to be happy about getting more sunlight. Seasonal Affective Disorder isn't fun for anyone. But the Solstice is fun even if you also celebrate Christmas. It's about light returning to our lives, however you want to define that. So in prep for Solstice, here are some creative ways to bring your own light.

Soda can lanterns. Saw this link on Cut Out and Keep and thought it was rockin'! Except all my cans would be beer cans from my husband. This would be fun with some foreign cans-- the asian food store near my house often has papaya juice or similar. Or how about red, white and green cans for Christmas/Solstice? To state the obvious, don't put these on your tree, okay? Tutorial is at The Star online.

This one requires that you already have a round paper lantern, and alas, the season for easily finding these has passed along with the patio furniture. (Check the clearance section- maybe you'll get lucky!) You can pick them up online, though. You can pick ANYTHING up online. I could see doing these with stars instead of circles, or using multiple colors of tissue paper. And glitter! Glittery glue! Or not, if you're not into the awesome that is glitter. Tutorial at The Swell Life.

If you've got more time (and patience) than I do, check out this folded lantern at ah-yi. It requires long paper, because that's all one piece. Possibly this could be altered to be done on a smaller scale?

Table lanterns from Design*Sponge Online. Very modern-y. Maybe use heavyweight Christmas wrapping paper in place of the colored cardstock? They're lovely as-is.
This year our light of choice was simple christmas tree lights strung on our fancy new white artifical tree. Last year we used LEDs on a real tree-- the white lights were so cold feeling! We picked out the fake tree this year and I realized I really quite like the white trees. I think it's because they don't even pretend to be real. I'm half tempted to leave it up year-round, switching the decorations (eggs and birds in the spring, flowers and suns in the summer, wee ghosties and skellingtons in the fall) but I doubt I could pull it off as a decorating feature and not just laziness with bells on.
Happy Holidays, however you chose to celebrate them!

Soda can lanterns. Saw this link on Cut Out and Keep and thought it was rockin'! Except all my cans would be beer cans from my husband. This would be fun with some foreign cans-- the asian food store near my house often has papaya juice or similar. Or how about red, white and green cans for Christmas/Solstice? To state the obvious, don't put these on your tree, okay? Tutorial is at The Star online.

This one requires that you already have a round paper lantern, and alas, the season for easily finding these has passed along with the patio furniture. (Check the clearance section- maybe you'll get lucky!) You can pick them up online, though. You can pick ANYTHING up online. I could see doing these with stars instead of circles, or using multiple colors of tissue paper. And glitter! Glittery glue! Or not, if you're not into the awesome that is glitter. Tutorial at The Swell Life.

If you've got more time (and patience) than I do, check out this folded lantern at ah-yi. It requires long paper, because that's all one piece. Possibly this could be altered to be done on a smaller scale?

Table lanterns from Design*Sponge Online. Very modern-y. Maybe use heavyweight Christmas wrapping paper in place of the colored cardstock? They're lovely as-is.
This year our light of choice was simple christmas tree lights strung on our fancy new white artifical tree. Last year we used LEDs on a real tree-- the white lights were so cold feeling! We picked out the fake tree this year and I realized I really quite like the white trees. I think it's because they don't even pretend to be real. I'm half tempted to leave it up year-round, switching the decorations (eggs and birds in the spring, flowers and suns in the summer, wee ghosties and skellingtons in the fall) but I doubt I could pull it off as a decorating feature and not just laziness with bells on.
Happy Holidays, however you chose to celebrate them!
Subscribe to:
Posts (Atom)